
블러링은 일반적인 엣지와 형태를 검출한다. 이후 스무딩을 하는 작업을 한다.
import cv2
import numpy as np
import matplotlib.pyplot as plt
%matplotlib inline기본 모듈들은 임포트 해준다
def load_img():
    img = cv2.imread('C:/Users/Owner/Desktop/Computer-Vision-with-Python/DATA/bricks.jpg').astype(np.float32) / 255
    img = cv2.cvtColor(img, cv2.COLOR_BGR2RGB)
return img이미지를 편하게 로드하기 위해 이미지를 BGR을 RGB로 convert 해준 함수를 정의한다
def display_img(img):
    fig = plt.figure(figsize=(12,10))
    ax = fig.add_subplot(111)
ax.imshow(img) #이미지 크게 보여줌이미지를 크게 불러오는 함수도 정의한다
i = load_img()
display_img(i)
1. Gamma Correction
감마 보정은 감마 value를 다르게 하여 이미지를 좀더 밝게, 어둡게 나타나는 작업을 한다.
img = load_img()
gamma = 1/4
effected_image = np.power(img, gamma)
display_img(effected_image)감마를 1보다 적게하면 더 밝아지고, 1보다 크면 이미지가 어두워진다.
이미지의 모든 픽셀값을 취해서 감마의 수치로 제곱을 한다.

img = load_img()
gamma = 2
effected_image = np.power(img, gamma)
display_img(effected_image)감마수치를 더 높이면 이미지가 어두워짐

2. Low Pass filter
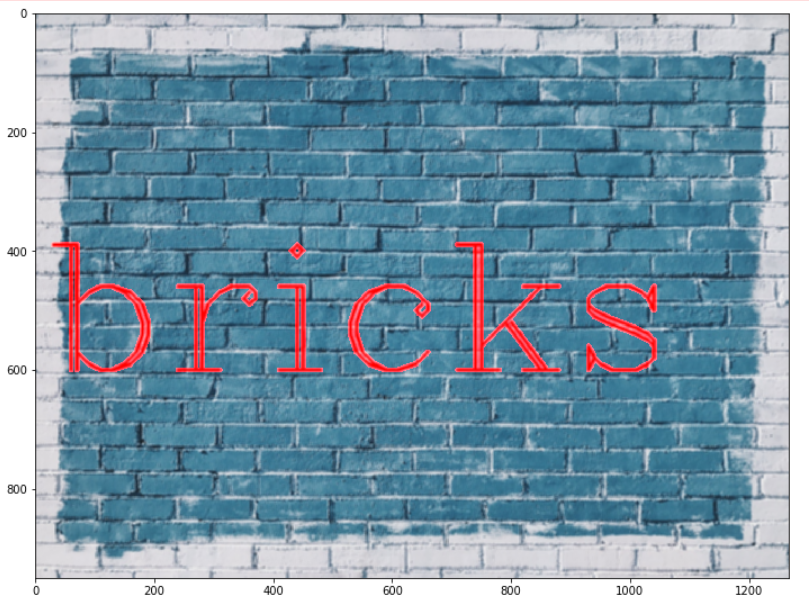
img = load_img()
font = cv2.FONT_HERSHEY_COMPLEX
cv2.putText(img,text='bricks',org=(10,600), fontFace=font,fontScale= 10,color=(255,0,0),thickness=4)
display_img(img)bricks 라는 글씨를 org=(10,600) 위치에 폰트를 10으로 하고, 빨간색, 두께 4로 하여 넣는다
이미지를 보면 글자 사이사이 빈틈이 있는것을 알 수 있다

3. Kernel
kernel = np.ones(shape=(5,5),dtype=np.float32)/25
kernel전체를 25로 나눠서 전체가 0.04로 채워진 5*5의 행렬이 되게 한다.
array([[0.04, 0.04, 0.04, 0.04, 0.04],
       [0.04, 0.04, 0.04, 0.04, 0.04],
       [0.04, 0.04, 0.04, 0.04, 0.04],
       [0.04, 0.04, 0.04, 0.04, 0.04],
[0.04, 0.04, 0.04, 0.04, 0.04]], dtype=float32)dst = cv2.filter2D(img,-1,kernel)여기에 2D filter를 적용한다. 출력 깊이가 음수면 입력깊이가 실제로 원하는 출력을 할당해야 한다. 마이너스 값은 입력 깊이와 같은 출력을 원함
display_img(dst)이미지를 보면 글자사이의 틈이 흐릿하게 채워진 것을 볼 수 있다. 커널크기를 작게 크게 조정해보면 이미지에 각기 다른 영향이 있을것이다
4. Averaging
img = load_img()
font = cv2.FONT_HERSHEY_COMPLEX
cv2.putText(img,text='bricks',org=(10,600), fontFace=font,fontScale= 10,color=(255,0,0),thickness=4)처음 불러온 이미지를 다시 불러온다
blurred_img = cv2.blur(img,ksize=(5,5))
display_img(blurred_img)앞서 수동으로 커널을 만들어서 이미지에 적용하기 위해 필터를 사용했다면, 여기서는 cv2.blur 커널을 사용한다. 커널 사이즈를 조정하면 블러링이 더 진해진다. 앞서 얻은 결과와 똑같이 나온다

5. Gaussian Blurring
img = load_img()
font = cv2.FONT_HERSHEY_COMPLEX
cv2.putText(img,text='bricks',org=(10,600), fontFace=font,fontScale= 10,color=(255,0,0),thickness=4)
display_img(img)blurred_img = cv2.GaussianBlur(img,(5,5),10)
display_img(blurred_img)이미지, 5*5 커널 사이즈, 시그마값 10을 넣어준다. 커널 사이즈에는 맞거나 틀린것이 없기 때문에, 임의로 바꿔주며 결과를 출력해봐야함
약간 핑크색이 되었고 라인이 뚜렷하지 않다

6. Median Blurring
img = load_img()
font = cv2.FONT_HERSHEY_COMPLEX
cv2.putText(img,text='bricks',org=(10,600), fontFace=font,fontScale= 10,color=(255,0,0),thickness=4)median = cv2.medianBlur(img,5) #커널사이즈(5*5)
display_img(median)median blur는 흐리게 하는 것 보다 노이즈를 제거함 . 디테일함을 챙기며서 노이즈를 제거하기 좋은 모델이다

출처: udemy X KMOOC OpenCV 및 딥러닝을 이용한 Computer vision 파이썬
'Deep Learning > Computer Vision' 카테고리의 다른 글
| Histograms with OpenCV (1) | 2023.07.16 |
|---|---|
| Gradients (0) | 2023.07.16 |
| Image Binary (0) | 2023.07.16 |
| 파이썬 마우스로 이미지에 직접 그리기 (0) | 2023.07.09 |
| 파이썬 이미지에 도형 그리기 (0) | 2023.07.09 |